The Spider Curl is a targeted bicep exercise that isolates the biceps by performing the movement with the arms at an angle, typically performed on an incline bench. This unique positioning helps to activate the biceps more effectively than standard curls, preventing any other muscle groups from taking over. Spider Curls help in building arm strength and mass, and can be an excellent addition to any biceps workout routine.
Spider Curl Video
How to Perform Spider Curls
Step-by-Step Instructions:
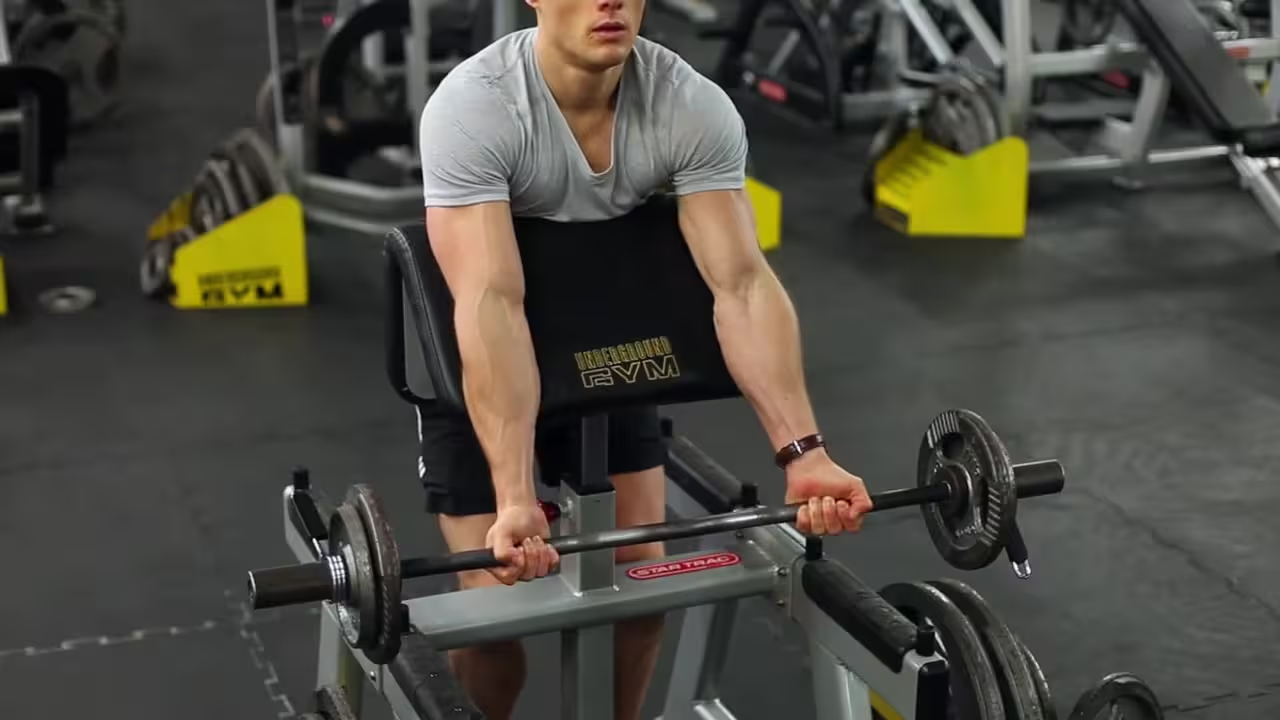
- Set Up the Bench: Adjust the bench to a 45-degree incline. Position yourself face down on the bench with your chest resting against the pad and your arms hanging down.
- Choose the Right Weight: Select a weight that you can curl with good form. Start with a moderate weight and progress as you gain strength.
- Grip the Dumbbells: Hold a dumbbell in each hand with your palms facing upward (supinated grip). Keep your wrists neutral to prevent strain.
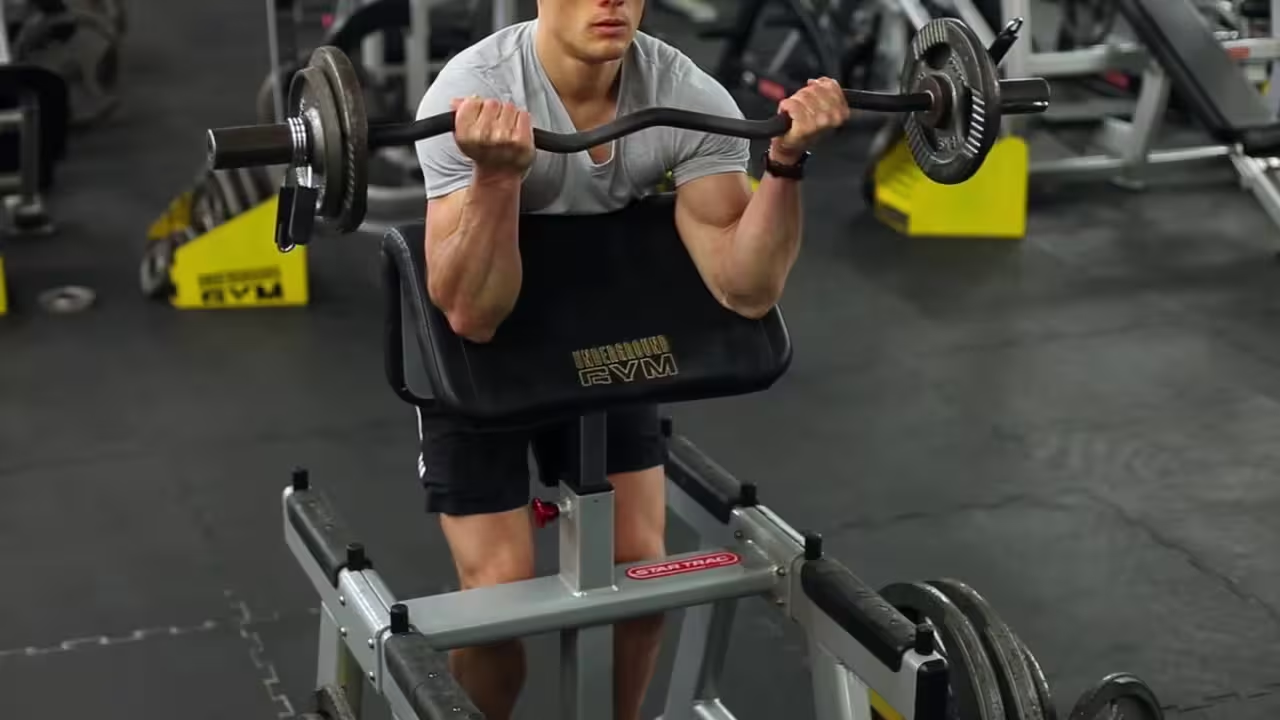
- Engage Your Biceps: Curl both dumbbells toward your shoulders, keeping your upper arms stationary. Focus on squeezing your biceps at the top of the movement.
- Lower Slowly: Lower the dumbbells slowly and in a controlled manner, fully extending your arms at the bottom without locking your elbows.
- Complete the Reps: Repeat the movement for your desired number of reps, maintaining good form throughout.
Spider Curl Benefits
- Increased Biceps Strength: Spider curls isolate the biceps more effectively, leading to better muscle activation and strength development.
- Enhanced Biceps Size: The unique positioning and controlled movement make Spider Curls excellent for stimulating hypertrophy and increasing muscle mass.
- Improved Flexion Strength: This exercise focuses on elbow flexion, improving strength in the movement that powers many upper body actions.
- Increased Muscle Activation: By preventing other muscle groups from taking over, Spider Curls ensure maximum biceps activation throughout the range of motion.
- Better Posture and Arm Definition: Stronger, well-developed biceps contribute to better posture and more defined arms.
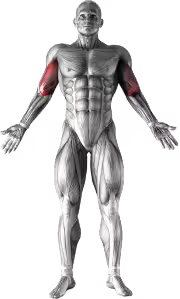
Spider Curl Muscles Worked
The Spider Curl primarily targets the biceps, particularly the long head of the biceps brachii, providing a deep stretch and full contraction. The brachialis and brachioradialis muscles assist in the movement, and the forearm muscles are engaged for stabilization during the curl.
Spider Curl Form Tips
- Bench angle: Set the incline bench around 30–45°. This keeps your upper arm in front of your torso and limits momentum.
- Chest down, hips stable: Keep your chest on the pad and avoid rocking to make the curl strict.
- Elbows stay pinned: Let the elbows hang naturally and keep them in place as you curl.
- Neutral wrists: Don’t curl the wrists. Keep the dumbbell handle stacked over your forearm.
- Squeeze at the top: Pause 1 second at peak contraction and control the lowering phase.
- Full range: Lower until the biceps are stretched, but don’t lock out aggressively.
Common Mistakes
- Swinging the weight: If you need momentum, the load is too heavy.
- Elbows drifting forward: This turns the movement into a different curl and reduces biceps tension.
- Bench too steep: A very steep angle shortens the range and can stress the shoulders.
- Short reps: Partial reps often happen when the weight is too heavy.
- Fast negatives: Control the eccentric for better hypertrophy stimulus.
- Letting shoulders shrug: Keep shoulders down and back to isolate the biceps.
Sets and Reps
As a finisher: 2–3 sets of 12–15 reps after heavier curls helps you chase a strong pump without cheating.
Training note: Use a load you can control. If form breaks, reduce weight and keep the movement strict.
Alternatives
- Concentration Curls (great for peak contraction)
- Exercise reference
FAQ
Are spider curls good for building the biceps peak?
Spider curls emphasize the top half of the curl because your upper arm is positioned forward. Use strict form and squeeze at the top for best results.
What bench angle is best for spider curls?
Most people do best around 30–45°. Too steep can limit range and make it harder to keep shoulders stable.
Should I use dumbbells or an EZ bar?
Dumbbells let each arm work independently and can feel more natural on the wrists. An EZ bar can be easier to load heavier while still staying strict.
Where should I feel spider curls?
You should feel the biceps working through the full curl, with a strong contraction near the top. If you feel your shoulders taking over, reduce weight and pin your elbows.
How often should I train biceps?
For most lifters, 2–3 biceps-focused sessions per week (with enough recovery) is plenty when combined with pulling exercises.
Spider Curl vs Preacher Curl
Quick take: Spider curls are usually the better choice when you want a strict squeeze and minimal cheating. Preacher curls are often better when you want a stable setup to progressively overload your biceps with heavier weight.
Choose Spider Curls if:
- You want a brutal peak contraction: the bench position makes it harder to swing and easier to “feel” the biceps.
- You cheat on regular curls: spider curls naturally reduce momentum.
- You’re chasing hypertrophy/pump: they work great as a mid/late-workout biceps movement.
Choose Preacher Curls if:
- You want a more stable setup to lift heavier: the pad support helps you stay consistent while adding load over time.
- You want controlled tension early in a workout: preacher curls are great when you still have energy to push hard.
- You prefer barbell/EZ-bar loading: it’s often easier to micro-load than dumbbells.
Programming tip (best of both):
If you train biceps 2 times per week, use preacher curls first (heavier) and spider curls second (strict + squeeze). This gives you overload + clean tension in the same week.
Spider Curl Variations
Spider curls are flexible: you can bias the biceps, or shift more work to the brachialis/brachioradialis. Pick 1–2 variations per phase and progress them for 4–8 weeks.
1) EZ-Bar Spider Curl
Best for: wrist comfort + progressive overload.
How to do it: use the same chest-on-bench setup, curl the EZ bar without letting your elbows drift. Keep the lowering phase slow.
2) Reverse-Grip (Overhand) Spider Curl
Best for: brachialis/brachioradialis (thicker-looking upper arms and forearms).
How to do it: use a lighter load, palms face down, and keep reps strict—this one burns fast.
3) Neutral-Grip Spider Curl (Hammer-Style)
Best for: a balanced hit on biceps + brachialis with a stronger grip position.
How to do it: keep palms facing each other and avoid turning it into a shoulder movement.
4) Single-Arm Dumbbell Spider Curl
Best for: mind-muscle connection and fixing left/right strength differences.
How to do it: curl one arm at a time, pause at the top, and match reps/tempo on both sides.
5) Two-Hands One Dumbbell Spider Curl
Best for: going heavier while staying strict.
How to do it: hold one dumbbell with both hands and curl smoothly—no swinging.
Simple progression
- Hypertrophy focus: 3–4 sets of 8–12 reps, 1-second squeeze + 2–3 second lowering.
- Finisher: 2–3 sets of 12–15 reps, strict form, short rest.
Related Exercises